Undertale for the NES
10 Jan 2021
The date on the post is when the project was completed in 2021, but this post is being written in 2026.
Undertale for NES cart download
Intro
Back during lock-down I became interested retro game development and ended up making a little demo, a fight from the indie-game Undertale remade (or “de-made”) to work on the NES.
It’s not a huge project, but I had fun learning 6502 assembler and the quirks of the NES.
Resources
I used this project as a basis, it provided the setup for compiling a NES cartridge and some of the basics which are the same for every game (clearing memory, getting controller input, etc.).
Fortunately, an NES compatible version of the boss fight music had already been created by VinylCheese and the enemy sprite is from the original game. To play the music, I used an existing driver which - honestly - I have no idea where I got it from, and probably there are better options nowadays so don’t take this list of resources as instructional!
For learning resources, the Undertale Wiki provided information on how the fight worked mechanically (but I also played through it many times to figure out the exact effects of every action).
The NES Dev Wiki was my primary resource NES development information.
I used Mesen, which is I believe the gold standard for accurate NES emulation and has heaps of useful debugging tools.
Entering the Matrix
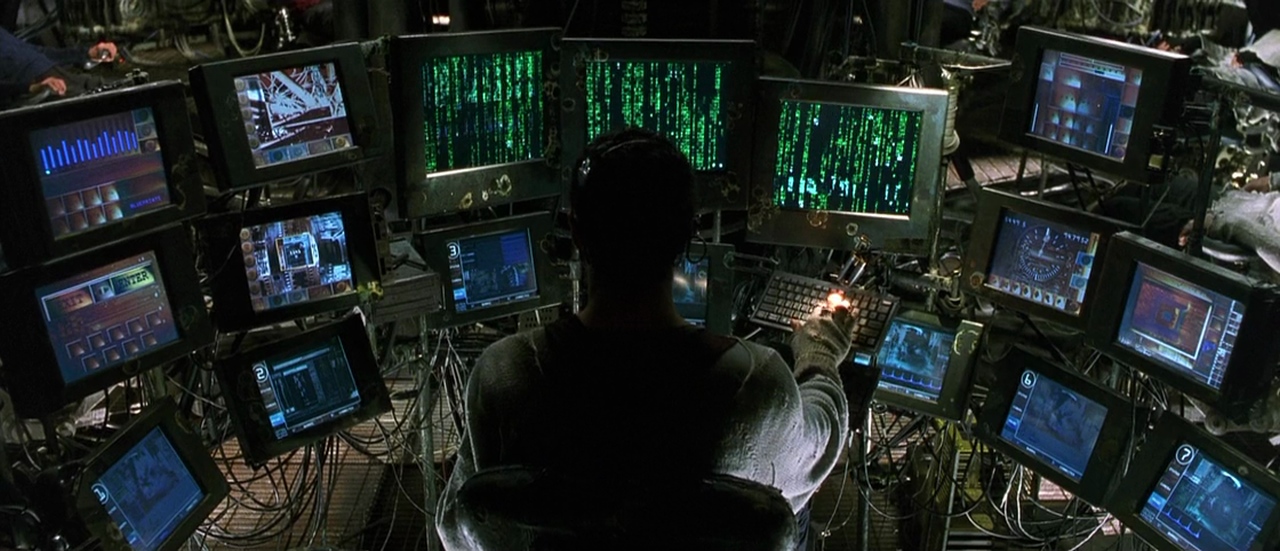
No UI/UX developers in the apocalypse apparently...
A program called CC65 is used to compile 6502 assembly, it is also capable of compiling C code, but I wanted to use assembly language as a learning experience (and the performance for C is much worse on 6502). One observation I’d like to make: though retro software development is often charcterised as more “hardcore”, it seems that in reality complexity has expanded in both directions. Higher level and easier languages become available, but at the same time, the lower levels have become more complicated, and the “stack” as a whole has become taller. 6502 assembly is closer to the hardware, but because the hardware is less complex than modern hardware I think it works out to about the same difficulty as something like C. The experience reminds me of graphics programming: there’s more friction, and I had to adapt to a new mental model than what I use for C-like languages.
State Machine Architecture
To organise the execution of the program, I created two state machines. First, a state machine for the overall game state, essentially what “screen” is currently active. Second, a state machine for each sprite, which includes functionality for player movement and Napstablook’s tear attack. To implement a state machine in 6502 assembly, a jump table is used. There is a static list of 2 byte addresses to each state function. The RTS trick to jump program execution to the current states function.
Cartridges
The NES uses cartridges, which means that some of the constraints an NES game is developed within are determined by the cartridge hardware used. A particular configuration of cartridge hardware is called a “mapper”. I used the most basic mapper, known as NROM, it is the same mapper that is used for “Super Mario Bros.”. It has one 8K CHR ROM for graphics data, and it has one 32K PRG ROM for program data.
If I wanted to do more than one or two fights, perhaps even port the whole game (though I am not going to do that), I would need a much more capable cartridge. It seems that the homebrew hardware of choice is UNROM-512 which has 512k PRG ROM and 32K of CHR RAM.
Graphics
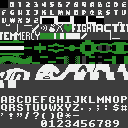
The tile pattern table
The NES uses 8x8 “characters”, with a 4 color palette. Put 256 of these together and you get a pattern table. On an NROM cartridge the 8K CHR ROM is divided into two pattern tables, one for sprites and one for tiles. The graphics for the demake fit quite comfortably within one pattern table, so no special optimisation was necessary there.
One area that was a bit annoying was figuring out the appropriate layout for the UI and palettes. There are 4 palettes for tiles and 4 palettes for sprites (at any given time), which is enough BUT there is the caveat that you cannot define the palette on a per-tile basis, they are grouped into 2x2 blocks which share the same palette. So, when arranging the UI I had to make sure I could change the palette of the buttons without messing up other graphics, everything had to conform to the 16x16 grid. Of course, I am balancing this against making things look as close to the original as possible.
There is enough space on the pattern table that I could probably have squeezed in another fight or perhaps some title screen graphics, but I didn’t so…
Another potential change would be combining the sprite and tile graphics into one pattern table, and then using the additional pattern table as the second variant/frame. That means I could alternate the pattern tables to create a two frame animation on any sprite or tile.
Conclusion
I am the type that starts far more projects than I finish, so I am quite proud that I saw this through to completion.
On the philosophy behind this kind of project I have some thoughts. I prefer other people to take the creative reigns of a project while I do the technical side, in a sense a demake supports that - the design and art are predetermined - but just because I don’t want to be the designer doesn’t mean I don’t want there to be a designer. These kinds of projects - and fan works and mods in general - are too me always stuck in a shadow, always limited. Fan works generally have to be non-commercial, and if I can’t make money from something I need to be getting something out of it that is more self-actualisation. I need an unbounded potential to be there, to be possible, otherwise I don’t see the point in carrying out the project.
De-making all of Undertale is possible (I think) but while I can withstand technical constraints I can’t abide the intrinsic railroading on what the project has the potential to be (when I’m not getting paid, much easier to be enthusiastic if you’re getting £19 an hour).